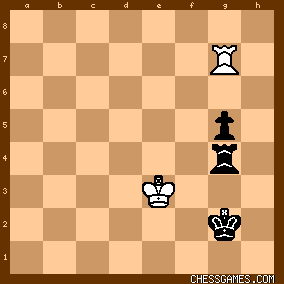
YouRang: After <90.Rg7>, Van Wely (black) faced this position:

click for larger view
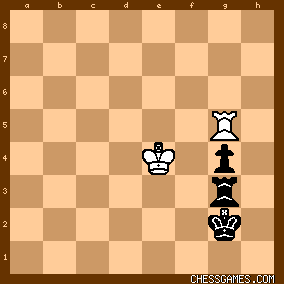
Obviously, he needs to guard that pawn! But he blundered badly with <90...Rg3+?> allowing <91.Ke4!> which threatens to double-attack the pawn with Kf5. <91...g4 92.Rg5!> moving the rook closer so that the K can take the pawn without allowing a skewer [diagram]

click for larger view
Now, black cannot hold off the double-attack threat of Kf4, and if 92...Kh3, then 93.Rh5+ Kg2 94.Rg5 (repetition). So, the game ended a draw.
~~~~~
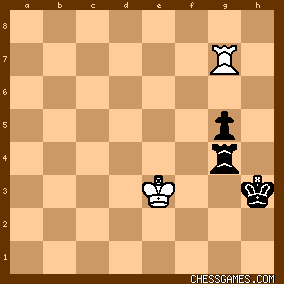
Following the correct way to proceed is instructive. Van Wely should have played <90...Kh3>!

click for larger view
This keeps the R at g4 to prevent white's K from approaching the pawn. If <91.Rh7+>, then <91...Rh4 92.Rg7> exchanging rooks wins for black <92...g4!> and the well-protected pawn makes progress. White's best try is to approach the front of the pawn with <93.Kf2> [diagram]

click for larger view
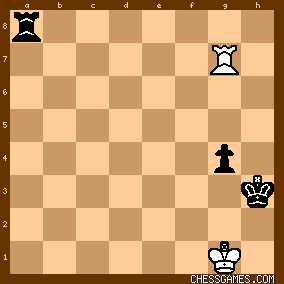
This is a critical move for black. Does he play ...Kh2 stop the white king from getting to g1? No! That would only draw. For black to win, his main objective must be to push the white K away to the e-file. Specifically, if the white K goes to g1, then black's rook must gain control of the first rank before white's rook does. Therefore, black needs to put his rook where it can accomplish this objective, e.g. <93...Rh8!> It may continue: <94.Kg1 Ra8> [diagram], and now black will control the first rank via Ra1 (if white is passive, say 94.Rg6, black can force this same position with 94...Rf8+! 95.Kg1 Ra8).

click for larger view
<95.Kf2 Ra2+ 96.Kf1 Kg3!> keeping the white K away from g1 with mate threat <97.Rg6 Ra1+ 98.Ke2>, and black has achieved his objective of pushing the K away to the e-file. With the white king out of the way, the rest is fairly simple. | 


