- Piling On Tactic-- OTB Examples
|
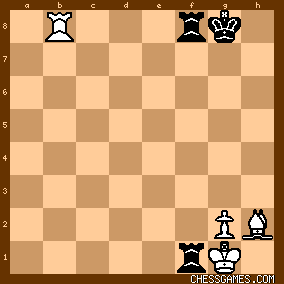
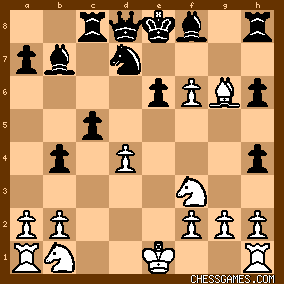
The Pin tactic, in all of its variations, is a fundamental tactic for all chess players to know. The partner of the Pin is the Piling On tactic. In fact, some literature present them together; no differentiation is made. Usually the Absolute Pin or the Relative Pin is the base for 'expansion.' I see Piling On as the follow-up to the Pin, usually the most important way to take advantage of an existing Pin. So, here are some examples that I have found at ChessGames.com. Probably the most interesting game of this collection is the one played in Moscow for the Championship of Europe for the Deaf-- Abid Sabotic vs Andrey Voropaj, Moscow 1997. There's a Piling On tactic by a Bishop against a pinned Bishop that ended the game-- White resigned-- mate is possible on the next half-move as well. The continuation finishes with a variation of the Box Mate in a vertical orientation. Very pretty! ChessCoachClark (CCC) originated this game collection and he updates it on occasion. This project is a work in progress, culling games from various sources, including several chess training books and personal research. The games are ordered by date (oldest first), not by importance. Be well.
Be safe.
|
|
29 games, 1937-2020 - Pinned Piece Is a Useless Piece! TRUE and FALSE!
|
A simple adage states, "A pinned piece is a useless piece!" Lets look at OTB examples and some compositions to see whether this is a true or false statement. By virtue of the simple definition of a Pin, especially an Absolute Pin (AP), no capture can be made by a Pinned piece. However, one needs to consider the subtlety of the rules of chess. For instance, in Castling, the rules forbid castling through check, castling out of check or castling into check. In a similar manner, even a chessman locked down by an AP disallows a King to stand anywhere in the line of fire or to capture a chessman guarded by such a chessman. Therefore, not only can it be said that the King is a weak defender, the King is actually a weak attacker as well. Another chessman would be fine capturing a chessman being protected by a pinned piece or moving into the line of fire of a pinned piece to attack somewhere, but the King is forbidden to do so. To see exactly what I mean, look at this example from BEGINNING CHESS, by Bruce Pandolfini, page 135, Exercise #166, Black to move:

click for larger viewand notice that the next move is checkmate in the Box Mate pattern:
click for larger viewHere, the White King makes an illegal move if capturing the Black Rook at f1:

click for larger viewIn Bobby Fischer Teaches Chess, p. 116, Diagram G, this problem is given, White to move:
click for larger viewThe solution is as follows:
click for larger view
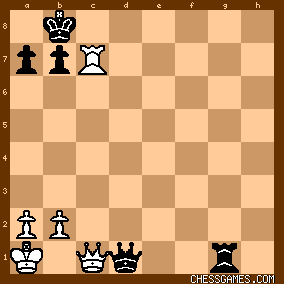
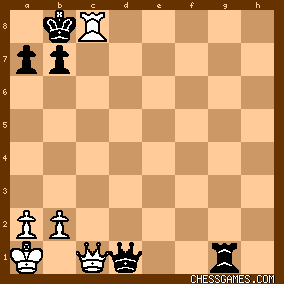
Note how White has executed a Back Rank Mate with support from a pinned Rook. No problem! Remember this! You should also know that the King is not the only chessman limited by a Pin. Only the King can have an Absolute Pin involved, but a Relative Pin (RP) against a Queen is by no means inviolable. The game by Legall and St. Brie in Paris in 1750 http://www.chessgames.com/pgn/de_le... is probably the most famous example. A second example OTB is this position from Mikhail Ivashchenko vs M Lugovskoy, 2004
included below:
click for larger view
Black will play Nxd5, leaving the Black Queen in danger by the g5-Bishop. After the White Bishop captures the Black Queen, Black plays Bb4+ and wins the White Queen. White was ahead by a Pawn before Black ignored the Relative Pin against the Black Queen. Now Black is ahead by two points (a Knight less a Pawn), so White resigns. My younger students find this game interesting also because it was played for the Russian championship by less than ten year olds! The game included below, V Zakhartsov vs A Ainutdinov, 2013, has two noteworthy cases of Pinned Pieces NOT Being Useless. First, at the play 48. ... Rd6, the Black Rook is safe from capture by the White King because of its protection from the pinned Black Bishop. (The Rook is poised to give X-Ray protection to that same Bishop, soon.) Second, this same game has a beautiful example at the end (although Black should lose with best play) where BOTH pinned pieces are NOT useless. The Black Rook keeps the d-Pawn safe and the Black Bishop still protects the b-Pawn, even though each is under an Absolute Pin! Finally, you should see for yourself that the statement quoted in the beginning is just a rule of thumb. Do NOT take it for granted that a pinned piece cannot support a mating attack/net! Look for the particular circumstances, rather than following an idea blindly. I repeat, look for the particular circumstances, rather than following an idea blindly! This point does not just apply to Pins and does not just apply to chess. Believe me. ChessCoachClark (CCC) originated this game collection and he updates it on occasion. This project is a work in progress, culling games from various sources, including several chess training books and personal research. The games are ordered by date (oldest first), not by importance. Be well.
Be safe.
|
|
19 games, 1750-2018 - Poisoned Chessman Tactic-- OTB Examples
|
Look out! In fact, look and think before you move! Biting the pretty side of the apple may not be good for you, princess. Even if not commonly thought of as such, Poisoned Pawns and their siblings feel like special traps to me. ChessCoachClark (CCC) originated this game collection and he updates it on occasion. This project is a work in progress, culling games from various sources, including several chess training books and personal research. The games are ordered by date (oldest first), not by importance. Be well.
Be safe.
|
|
9 games, 1912-2005 - Promotion Mate Examples
|
In keeping with the theme that even the rules of chess may become tactics, this game collection is meant to carry Promotion Mate Examples. Under-Promotion mates will also be included here. ChessCoachClark (CCC) originated this game collection in October of 2024 and he updates it on occasion. This project is a work in progress, culling games from various sources, including several chess training books and personal research. The games are ordered by date (oldest first), not by importance. Be well.
Be safe.
|
|
14 games, 1880-2021 - Promotion Tactic-- OTB Examples
|
Whenever a Pawn reaches the other side of the board, it must be upgraded, becoming a full piece, not just a chessman. The formal name for this change of powers, shape and function is PROMOTION. This is not an optional entitlement, but is required. A Pawn cannot remain as it is and it cannot become a King. No other chessman can earn Promotion. This privilege of ennoblement or dramatic elevation only applies to the Pawn. Therefore, "Pawn Promotion" is unnecessarily precise in chess literature. Upgrading to a Queen is so commonly expected that the term UNDERPROMOTION is used for the other three cases-- Rook, Knight or Bishop upliftment. In fact, a separate game collection is being prepared for Underpromotion. ChessCoachClark (CCC) originated this game collection and he updates it on occasion. This project is a work in progress, culling games from various sources, including several chess training books and personal research. The games are ordered by date (oldest first), not by importance. Be well.
Be safe.
|
|
20 games, 1794-2019 - Queen and Bishop Mate Examples
|
Games are posted here that show a Mate brought by a Queen with the support and/or protection of a Bishop. I observe a distinction between mating patterns in games that could be saved under the same heading but for the order of the pieces involved. Also, I would not name a pattern by the superior piece first. My methodology is to name the mating pattern by the chessman that brings the mate. Therefore, there are two separate game collections for what others would call the Queen and Bishop Mate in my work. This game collection is the first one I prepared and there is a different one for the Bishop and Queen Mate. To keep the header within its brief limit (63 characters) for each game, these abbreviations will be used: =M= if the game ends with mate; =C= when the targeted King is mated in a corner; =W= where both players are women; =G= indicates both players are girls; =Un= is given for players 14 years old or younger. The notation <Qn> is for identifying quadrants of the chessboard, clockwise from upper right and governed by the position of the defending King. So, <Q2> is the second quadrant, which includes the h1 corner. ChessCoachClark (CCC) originated this game collection in October 2024 and he updates it on occasion. This project is a work in progress, culling games from various sources, including several chess training books and personal research. The games are ordered by date (oldest first), not by importance. Be well.
Be safe.
|
|
6 games, 1922-2017 - Queen Sacrifice Wins-- OTB Examples
|
Beginners are keen to hold onto and protect their Queen, but a keen eye for winning the game by losing that Queen is a skill to be desired. (Smile if you think Monday Puzzles are a limited source of candidates for this game collection!) ChessCoachClark (CCC) originated this game collection and he updates it on occasion. This project is a work in progress, culling games from various sources, including several chess training books and personal research. The games are ordered by date (oldest first), not by importance. Be well.
Be safe.
|
|
9 games, 1863-2017 - Railroad Mate Examples
|
This checkmate is much more a process than a resulting pattern. The key idea is that the Queen and Rook are exerting parallel fences of power as if they were laying the rails of a train track. Therefore, the opposing King is caught between these two fences. The attacking Queen and a Rook keep shifting positions, from one snapshot to the other, all the while pushing the opposing King again and again, until the checkmate is made. So, what are these snapshots in detail? In one snapshot the Queen and Rook are across from one another and the Queen makes check (the Queen and Rook are on the same railroad tie-beam and they are giving mutual protection):

click for larger view
This position uses the Battering Ram or Barrage tactic. In another snapshot, the Rook is on the diagonal from the Queen when it makes check (only the Rook is protected, but the Queen is out of reach by the enemy King):

click for larger viewNote that either snapshot could be the starting point for the process of the Railroad Mate. Some players visualize the process as carrying themselves across monkey bars, swinging from the position of both hands on the same bar to the position with one hand on the next bar, then forward to a new position with both hands on the next bar. Another group of players see the capital letter N (or its mirror-image) being repeated. Still another group sees a rather stilted use of scissors, being closed in one snapshot and opened on only one side in the other snapshot-- 'walking' the scissors across the board. Of course, you may use your own imagination or forego taking any simulation and enjoy the process as it is. However you go, do note that the alternation of the snapshots could proceed either along a horizontal path (the default for the diagrams above) or along a vertical path. The vertical Railroad Mate may be considered by some to be a simplified King Hunt. Korolikov composed the following White to Move and Mate problem that uses helpers to produce a vertical Railroad Mate with Rook and Bishop:

click for larger viewNo, the solution is not given here, but eight moves do the job ;-) It uses two defensive X-Ray tactics that each make a check as well, then ends with an X-Ray Mate that has followed the Railroad Mate process. (If you must have the solution right now, then see Composition #94 in CHESSBOARD MAGIC <1960> by Irving Chernev.) An interesting shortcut of the Railroad Mate process is to keep the opposing King locked up between Queen and Rook, then Promote to a major piece and bring it for checkmate between the restricting Queen and Rook. (This maneuver is a safe way for less-experienced chess players to use three Rooks or three Queens to make checkmate!) Staunton vs NN, 1850, 25 moves, 1-0
[bad chessgames.com link]
Here, the ending looks like a Railroad Mate, vertically (Snapshot 1)
Process of getting to the mate is not the same, though. There is a Railroad Mate after a long continuation by Stockfish 17 for this game:
M Umansky vs M Blokh, 1983
Vertical form (Snapshot 1) but with a Pawn on the team to shorten the process considerably. In this game, the Railroad Mate acts as the shortcut, after a long continuation
R Ruck vs M Hofbauer, 1995
Vertical process was utilized
(One of two lines given by computer analysis) This game shows the Railroad Mate threat
Smagin vs V Bukhtin, 1982
(Snapshot 2) winning at the last move, triggering a resignation:

click for larger viewIt is an obvious 'Mate, Don't Take!' situation-- do not capture the Black Queen after 34. ... Kxh2. Instead, play 35. Qf2 Kh3 36. Rh1# There is another game collection, Railroaded into Kill Box or Triangle Mate, which has been compiled by fredthebear, but he makes qualifications on his list. I made my collection independently and before I saw his. So, our descriptions differ. The first snapshot given here is what he called the Triangle Mate (when at the edge and checkmate). The second snapshot given here is what he called the Kill Box, again when it completes the checkmate. Check out what fredthebear did; you should find it useful. The King Hunt, by John Nunn and W. H. Cozens, should also be cited as a useful resource. That book has several example games that illustrate the Railroad Mate and they are listed here in this game collection. ChessCoachClark (CCC) originated this game collection in Sept. 2019, but from games and a composition discovered in 2016. He updates it on occasion. This project is a work in progress, culling games from various sources, including several chess training books and personal research. The games are ordered by date (oldest first), not by importance. Be well.
Be safe.
|
|
12 games, 1860-2016 - Raking Bishops Mate Examples
|
The Raking Bishops Mate features two Bishops (or a Bishop and Queen) that are next to each other and showing their power on adjacent diagonals. Therefore, this mate pattern is quite distinct from the Boden's Mate ("Criss-Cross Mate"). When the attacking side's King is close enough, these Bishops are sufficient for the checkmate, but normally some helpers are involved. The Raking Bishops Mate is my colorful name for the Horwitz Bishops, which honor Bernhard Horwitz (1807-1885). This mate pattern may also be called Doubled Bishops, Parallel Bishops, Slashing Bishops, Tandem Bishops, and other names. However, "Harrwitz Bishops" is a mistaken reference to a contemporary of Horwitz, Daniel Harrwitz (1821-1884). Both of these adept chess players were born in Germany and they played many games against each other. Three examples of these Bishops are given by Nimzowitsch in his book, MY SYSTEM, pages 148-149 (where "Horwitz Bishops" was given). Here is the final position from the first one:

click for larger viewThere are many games with Raking Bishops that are not included at ChessGames.com yet, but my favorite is a Raking Bishops Mate carried out by a Pawn and a Bishop, amazingly:
click for larger view
Agrest, Evgenij - Agrest, Svetlana
Cutro ITALY 2007 29 moves 1-0
ChessCoachClark (CCC) originated this game collection in 2015 and he updates it on occasion. This project is a work in progress, culling games from various sources, including several chess training books and personal research. The games are ordered by date (oldest first), not by importance. Be well.
Be safe.
|
|
26 games, 1852-2016 - Relative Pin Tactic-- OTB Examples
|
The Pin is one of the most fundamental chess tactics and the Relative Pin is one of the two most common kinds of Pin (the Absolute Pin being the other). The Relative Pin has one chessman attacking two on the same line, but the first being attacked is more valuable than the chessman behind the first target. That second target must not be the King, since in that case, it would be an Absolute Pin. Piling On, another tactic in itself, is very effective in conjunction with either an Absolute Pin or a Relative Pin. However, look at these games for other examples where someone takes advantage of the Relative Pin, maybe even for checkmate! ChessCoachClark (CCC) originated this game collection and he updates it on occasion. This project is a work in progress, culling games from various sources, including several chess training books and personal research. The games are ordered by date (oldest first), not by importance. Be well.
Be safe.
|
|
20 games, 1880-2015 - Removing the Defender Tactic-- OTB Examples
|
You should have heard that you need to coordinate your chessmen, but it is also important to notice how your opponent is coordinating their chessmen and see if you can take advantage of any weaknesses there. Removing the Defender is one tactic that can readily serve this purpose. Also called Removing the Guard, Annihilation of Defense (whew!), Undermining and Driving Off, Destruction and other names, it is an essential tactic to learn and use wherever you can. Once you find a relationship of protection between two pieces, attack the one with support and then look for a way to displace the protector, even if that piece is protected. By pulling away that supporter (here's the idea of undermining), your first attack could win you that piece. So, a little "chain reaction thinking" may get big results. The big idea is that having only one level of protection can be a weakness. Remember that a successful tactic often spells a winning advantage or even a checkmate process for the aggressive player. ChessCoachClark (CCC) originated this game collection and he updates it on occasion. This project is a work in progress, culling games from various sources, including several chess training books and personal research. The games are ordered by date (oldest first), not by importance. Be well.
Be safe.
|
|
17 games, 1849-2018 - Rook Roll Mate Examples
|
NM Bruce Pandolfini seems to have coined this quaint name for a checkmate process that can actually be done by more than just the Rooks. Not only could the rolling process be done with a Queen and a Rook, it can also be done along diagonals, with Bishops or Queen and Bishop. The Lawnmower Mate (GM Karsten Muller), Staircase Mate (IM Jeremy Silman) or Steamroller Mate (CCC and others) are just a few of its other names. This mating process certainly must be an essential part of your "toolbox." I usually show the process on a giant chess set with the visually appealing action of literally rolling up the cloth chessboard as the King is pressed back, over and over again, to the edge of the chessboard. The Rooks are being coordinated in a staggered formation, either making the space for the King get smaller and smaller, or keeping that space the same size (when the defending King gets aggressive). You could compare the staggered moves to climbing stairs, or going up a ladder-- but no baby steps by having both feet on the same level. The Rooks do not occupy the same rank or file. Two points should be emphasized to a beginner.
First, the SPACE of the King is everywhere it can 'see' until a fence or wall cuts it off. The REACH of the King is how far it can move-- just one square in any direction. The Rooks are working together as a team to keep reducing the SPACE of the King with their walls or fences squeezing it toward the edge or a corner. (Compare these terms with the domain and range of functions in algebra.) Second, when the opposing King is far away from the Rooks, they do not check the King on their first move. They cut down the space of the King, but without checking. They have to set up the Rook Roll for the easiest mate. Checking will give the other King two choices for the line it could occupy. Their first Rook move should force the King to stay in the smaller SPACE. So, the example given below is simpler because the King is quite close to the Rooks and thus when put in check, it has only one rank to use (although its REACH is three squares) anyway. The Rook Roll Mate process is a good demonstration of the principle that the checkmate is easier to handle after you force the enemy King to the edge or to the corner of the chessboard. Eight squares are in the reach of the King in the Center, five squares at the edge, but only three squares in any corner. Here is one typical, full version of the Rook Roll Mate, with Black to move:
click for larger view
The Black King cannot move into the first rank. The REACH of this King is five squares now (g2, g3, f3, e3 and e2) and its SPACE is the area within d2, d8, h2 and h8. 
click for larger view
1. ... Kf2.
The Black King had no choice but to shift over or retreat to the third rank. The reach and space of the Black King have not changed. 
click for larger view
2. Ra2+.
White begins the process of rolling back the Black King. This check makes its reach only three squares. If White plays correctly, the reach stays at three squares for each check all the way to the edge or corner. 
click for larger view
2. ... Ke3
The Black King had to retreat to the next rank.

click for larger view
3. Rc3+
The other Rook is brought up to push the Black King back. Note that the White King has no role in this checkmate process. 
click for larger view
3. ... Kd4
The Black King gets aggressive, retreating along a diagonal, thus getting close enough to the lead Rook to attack it. 
click for larger view
4. Rh3
The leading White Rook shows its power! It keeps the (rank-wise) space the same without retreating at all. The White King is so close to the action that 4. Kb2 or 4. Kc3 would be better. Also, 4. Raa3 is more effective than 4. Rh3-- and shows the idea of mutual protection, but I chose to reinforce the simpler process at this stage because both of these options connect to the Waiting Move tactic. Digressing or putting too much into one lesson may not be helpful to retention. Your mileage will vary with your students. ;-) 
click for larger view
4. ... Kc4
The Black King must retreat or shift over one square. 
click for larger view
5. Ra4+
White forces the King back again.

click for larger view
5. ... Kb5
The defending King gets aggressive again, with the other White Rook being in the vanguard now. 
click for larger view
6. Rg4
Notice that the vanguard Rook was not brought to the edge, but only to the g-file. This offset establishes the staggered formation crucial to the mating process. Again, the leading Rook shows its power by keeping the space the same for the King and with no retreat being necessary at all. Again, 6. Rhh4 is a viable option, but with the same caveats mentioned at move 4 for White. 
click for larger view
6. ... Kc5
The Black King must retreat.

click for larger view
7. Rh5+
White keeps switching which Rook is in the vanguard, rolling the King back each time. Keep the Rooks out of the way for each other by keeping the stair-step, ladder or staggered formation. The name Lawnmower Mate seems obvious now, as the gopher can't hide in the short grass. A little bit of imagination lets the name Steamroller Mate apply to this process as well-- I've seen two steamrollers working together to pave my street and finishing a parking lot at a big box store. Looking at the pattern of your climbing feet makes the names Ladder Mate, Stairsteps Mate and Staircase Mate suitable. Chess literature uses all of these names and others. 
click for larger view
7. ... Kd6
The Black King must retreat.

click for larger view
8. Rg6+
The other Rook becomes the vanguard Rook.
click for larger view
8. ... Kd7
The Black King must retreat.

click for larger view
9. Rh7+
The other Rook becomes the vanguard Rook.

click for larger view
9. ... Kd8
The Black King must retreat.
The enemy King has been forced to the edge (sometimes to a corner) of the board, where it is easier to make checkmate. Seeing the pattern of earlier moves, even a beginner should be able to see how to checkmate on the next move. 
click for larger view
Rg8#
Here is the Rook Roll Mate completed. Essentially, the entire process is a King Hunt or King Chase that has checkmate as its conclusion. No one, not even the World Chess Champion, can defend against this process if you play it properly, avoiding stale-mate. Rewards come to those who are methodical and patient. Time for an obvious admission now. I necessarily admit that I have just shown the mind-numbing process for this mate, according to better players. Most definitely, no computer analysis engine would use it. IM Jeremy Silman and others do use it for beginners, however, so I unabashedly do so as well. Go look on Amazon for SILMAN'S COMPLETE ENDGAME COURSE and you can read several reviewers who criticize IM Silman harshly for showing this easy method. However, I maintain just as strongly that is good for beginners to have fun whenever they can have it while learning chess. This easy approach, then, is not only simple, but fun and well-remembered to boot. In fact, I've discovered that an even higher-titled author has exclusively shown the easy method of the Rook Roll Mate. To wit, CHESS ENDGAMES FOR KIDS, pp. 14-15, Endgame Lesson 2: Mate with Two Rooks has been written by GM Karsten Muller. He calls it a Lawnmower Mate as well. Not only a Grandmaster, but also a famous chess author in his own right. So, back off it, haters!
It's one thing to wax esoteric and theoretical. It's another thing to deal with the practical realities of learning-- and retaining-- information. Knowledge only comes from understanding, retention and application. If the children can't do it, then they haven't learned it. Being a drill sergeant for KIDS will not work as often as some teachers want to think it will. I prefer to treat them as CHILDREN who have real needs and are real people. So, just as I teach both methods in my classes, is only fair that I describe the fast way to get a Rook Roll Mate in this game collection. The big idea is to initially make a dramatic drop in the space of the King. I mean you really cut it down to nearly nothing right out of the starting gate. You take away a lot at jump street, even making an L-Square or double-fence reduction when one of the Rooks is appropriately placed. In other words, the easy method makes stripes, the fast method makes frames, cutting down on both the files and the ranks available to the targeted King. You have an abbreviated version of the process, then. It is far faster and more efficient, but harder for many beginners to see. Furthermore, it can be done by pushing the King away from your Rooks or pulling the King toward them as you put the cramps or clamps on it. Any chess analysis engine may generate the mate in five or six moves then. For example, from the starting diagram shown above, 2. Ra3 or 2. Rc3 would effect the fast method. All of the games in this collection use the fast version of the Rook Roll Mate's process. Only the fast approach makes sense when a player has a Rook and Queen or two Queens. In fact, those two cases deserve even faster methods that utilize the enhanced lines of power from the Queen. Yes, the fast process is more efficient, more elegant and more formal or rigorous, but the easy process is so cutesy and logical that it should be shown at least once. (It may keep a flustered or distracted young tournament player away from a draw, also!) ChessCoachClark (CCC) originated this game collection and he updates it on occasion. This project is a work in progress, culling games from various sources, including several chess training books and personal research. The games are ordered by date (oldest first), not by importance. Be well.
Be safe.
|
|
32 games, 1870-2018 - Royal Absolute Pin Tactic-- OTB Examples
|
The most powerful kind of Absolute Pin is the Royal Absolute Pin (RAP), since the Queen is attacked directly and the King is being attacked indirectly. It is both the En Garde tactic and the Absolute Pin tactic in the same play. ChessCoachClark (CCC) originated this game collection and he updates it on occasion. This project is a work in progress, culling games from various sources, including several chess training books and personal research. The games are ordered by date (oldest first), not by importance. Be well.
Be safe.
|
|
22 games, 1872-2019 - Royal and Grand Family Forks-- OTB Examples
|
This game collection provides games where the Rook, Knight or Bishop takes on the King and Queen and even the King, Queen and Rook. I can still remember the wonder at the first time I encountered either of these bodacious affronts to nobility. ;-) Also, the prelude needs to be clever in order to drop such a 'surprise' on the defender, in most cases. Who is not to see such dynamic and powerful developments in a game? Especially acute is any case where a Queen or Rook is made En Prise! Game over, for all practical purposes, then. ChessCoachClark (CCC) originated this game collection in October of 2021 and he updates it on occasion. This project is a work in progress, culling games from various sources, including several chess training books and personal research. The games are ordered by date (oldest first), not by importance. Be well.
Be safe.
|
|
32 games, 1923-2019 - Seventh Rank Mate Examples
|
The Seventh Rank Mate is not one of the fundamental checkmates, but it has importance. Also called the Blind Swine Mate, this pattern requires a "stopper" to hold the King in place for the two Rooks. Even having the targeted King in the corner is not enough. The chessman that obstructs the King could be from its own team, an attacker of that square, a protected team member from the other side, etc. However, when one Rook and one Queen are teaming up for the checkmate and the Queen leads the mating attack, then the Queen's diagonal powers are enough of a stopper. That Queen just needs that Rook to provide for its protection. The Seventh Rank Mate or Blind Swine Mate is quite an illuminating demonstration for the value of a Barrage, Battering Ram or Battery against the King on an edge rank. See "Edward Winter presents: Unsolved Chess Mysteries (21)" for extensive material on the Blind Swine description. See other game collections on this topic, especially 7th heaven! 7th rank above all!, which was compiled by notyetagm. ChessCoachClark (CCC) originated this game collection and he updates it on occasion. This project is a work in progress, culling games from various sources, including several chess training books and personal research. The games are ordered by date (oldest first), not by importance. Be well.
Be safe.
|
|
17 games, 1863-2019 - Skewer Check Tactic-- OTB Examples
|
This game collection shows cases where the King is put in check and is 'hiding' an undefended piece behind it as well. I smile any time I recall that WGM Jennifer Shahade describes a Discovery tactic as a "Peek-a-Boo" tactic. Thus, one could say that having a Queen "hiding" behind the King to become En Garde and En Prise is, indeed, the worst-possible "Peek-a-Boo" scenario. It can be so painful to be the target of such a tactic that a defender will be on the alert for such a ploy. Therefore, the attacker needs to be sneaky or clever (or both), so each successful Skewer Check is likely to be a wonder to behold. I was shocked the first time I saw one, as it was unexpectedly beautiful-- M Roiz vs T Warakomski, 2005 
click for larger view. I prefer to use Skewer Check for most cases, but if the Queen is behind the King, then Royal Skewer might seem to fit better, but that may actually be ambiguous because either the Queen or the King could be first in line (both are Royal pieces). Actually, with the Queen first in line, the tactic is a terrific (in the original sense of the word) Absolute Pin, though. Absolute Skewer is akin to Absolute Pin, but I see no need to split the category past Absolute Pin. Hope you enjoy these games as much as I do.
ChessCoachClark (CCC) originated this game collection in 2021 and he updates it on occasion. This project is a work in progress, culling games from various sources, including several chess training books and personal research. The games are ordered by date (oldest first), not by importance. Be well.
Be safe.
|
|
9 games, 1860-2007 - Skewer Tactic-- OTB Examples
|
One of the most basic and truly essential chess tactics to learn is the Skewer. This tactic is an in-line operation where a chessman of higher value is being attacked while a chessman of lower value is behind it. Thus, when the big one moves out of the way, the little one is taken. Another way of looking at the arrangement is to say that you have three pieces lined up, an attacker against one defender directly and a second defender at the rear. This third chessman is being indirectly attacked. Edward Winter cites Kenneth Harkness as having written in the April 1947 issue of the CHESS REVIEW that: There is another type of double attack in which the targets are threatened in one direction. The attacking piece threatens two units, one behind the other, on the same rank, file or diagonal. This double threat has lacked a good descriptive name. We suggest 'X-Ray’ attack.' Only a few players try to use the term X-Ray tactic as a synonym for Skewer. However, the Skewer can only be an attack, never a defense, while the X-Ray tactic can be either offensive or defensive. Further, the Skewer has one unit actually attacking both pieces, whereas the X-Ray has two pieces attacking just one piece. See my game collection X-Ray Tactic-- OTB Examples for more details. The name Skewer is also used when the two defending chessmen are the same kind (two Rooks, for example) or have the same value (such as a Knight and Bishop). The chessmen attacked in the front and back are equal, then. The BALANCED SKEWER is my own term for these special cases, in spite of the fact that the Bishop and Knight may have differing values. To wit, some chess writers will give 3-1/2 points or 3-1/4 points for the Bishop. My point is that they are so close in value that Balanced Skewer should still apply when the defenders are Knight and Bishop. A few games with this particular form of the Skewer tactic are provided here. One that is not available yet at CG is Gurevich, Mikhail vs Garcia Ilundain, David 1995, 32 moves, 1-0 that has two Rooks being skewered. The material was even for both sides, before the Balanced Skewer was made! Here is that winning position: 
click for larger viewThere are two other special cases for the Skewer. An ABSOLUTE SKEWER occurs when the King is in front and any other chessman sits behind that King. Since the King is being attacked, the first law of chess must apply and the three possible responses to check must be carefully thought about. Kasparov vs Lutikov 1978 and Short vs Vaganian 1989 have the Absolute Skewer tactic. The ROYAL SKEWER is a more colorful name for the Absolute Skewer. Although both terms are uncommon in the literature, the term Absolute Skewer came to my attention only recently. I would prefer to use it whenever the King is the middle unit. However, in keeping with the terminology for Pins and Forks, I suggest that Royal Skewer only be used when the Queen sits behind the King. Thus, the two symbols of royalty are involved in each: the Pin, the Fork and the Skewer. The name corresponds in each case, then, although the configurations differ. A RELATIVE SKEWER occurs when some other chessman-- not the King-- is under attack in the vanguard, with a less-valuable chessman behind it. Only the line pieces-- Queen, Rook and Bishop-- have the power to work together to attack the way the Skewer needs. The Skewer can only be done on a rank, file or diagonal and then over several squares on one of those lines. Therefore, the King, the Knight and the Pawn are not able to make the Skewer tactic. Some of these games were included in LEARN CHESS TACTICS by John Nunn, Chapter 4, Skewer. He makes the interesting point that you may need another tactic first to get to a Skewer next. In other words, you may need to be sneaky to do it! For example, here is an Absolute Skewer study that is commonly shown (altho not by Nunn in this book) that wins a Rook: 
click for larger view
White to move

click for larger view
Rh8
click for larger view
... Rxa7
click for larger view
Rh7+ (Absolute Skewer) and the Black Rook is lost! Wikipedia has a short but useful article on the Skewer tactic with a few helpful diagrams as well. Here's their link: https://en.wikipedia.org/wiki/Skewe.... The Short-Vaganian game was mentioned there with useful comments. Edward Winter has the excellent article, THE CHESS SKEWER from 26 Oct 2014, http://www.chesshistory.com/winter/.... The Kasparov-Lutikov 1978 game is mentioned there. This article is a worthwhile read for the history of this tactic and other jewels of information. Do not underestimate the usefulness of this tactic! Just because it is easy to explain does not mean that it can be easily avoided. It does indeed deserve your time and effort to learn! Keep on the lookout for chances to use it, because the Skewer will often be a game-winning tactic. ChessCoachClark (CCC) originated this game collection and he updates it on occasion. This project is a work in progress, culling games from various sources, including several chess training books and personal research. The games are ordered by date (oldest first), not by importance. Be well.
Be safe.
|
|
33 games, 1860-2016 - Smothered Mate Examples
|
Only the Knight can bring a Smothered Mate, as only the Knight is able to jump over any chessman. Probably the most popular checkmate pattern, the Smothered Mate often fascinates new chess players and retains its popularity even after one becomes proficient. Like the Arabian Mate, the Smothered Mate dates from the earliest days of chess because the move of the Knight has remained unchanged from the beginnings of chess play. What can make the Smothered Mate so amazing is that the Knight is often unprotected, just moving into position at a hole in the defenses of the opposing chessmen. It can be a psychological shock to the opponent even as a threat tactic because otherwise, the King seems to be so well-protected. Masters have relied on this mating pattern as well as intermediate players. Do consider it to be an essential part of your chess knowledge, then. It can help you become a winner and improve your skills if you are just learning about the Smothered Mate. It should be noted that a Queen sacrifice (technically, a sham sacrifice) is only one of several ways to bring about a Smothered Mate. There are many variations on the theme, but I suggest classifying Smothered Mates in three ways. Type A has the attacking Knight one rank away from the defending King. Type B has the attacking Knight two ranks away from the defending King. Then a group of special Smothered Mates, even in the vertical orientation. Here's a pictorial for the Type A Smothered Mate, which is a skeleton/extract (only the essential chessmen are shown) of the game Credit vs Edl, FICS, 2008 (not provided at ChessGames.com, yet):

click for larger viewThis is a pictorial for the Type B Smothered Mate, which is a skeleton/extract of the game Trefny vs Stratil, Czech Republic, 1994 (not provided at ChessGames.com, yet):

click for larger viewA curious or eager student should not only look at the Smothered Mate itself (to make it familiar), but also look at the moves just before the Smothered Mate occurs. Check out how the winning player prepared for the mate and try to see if the losing player could have avoided it. A serious student will play through the entire game, finding tactics, trying to see strategies and even evaluating the opening. These over-the-board (OTB) examples can provide valuable insights to you and help make the Smothered Mate pattern become an active part of your "toolbox." ChessCoachClark (CCC) originated this game collection in 2018 and he updates it on occasion. This project is a work in progress, culling games from various sources, including several chess training books and personal research. The games are ordered by date (oldest first), not by importance. Be well.
Be safe.
|
|
23 games, 1864-2008 - Suffocation Mate Examples
|
The Suffocation Mate is easily considered a special case of the Smothered Mate. The King is quite nearly surrounded by his own team, having but one escape square. As a matter of fact, some chess writers call it the Semi-Smothered Mate. As with the Smothered Mate, only the Knight executes the Suffocation Mate. A beautiful case of the Suffocation Mate is when the same Knight not only attacks the King, but also covers its solitary flight square. This special version is a fine example of elegance, simplicity and beauty in chess. ChessCoachClark (CCC) originated this game collection and he updates it on occasion. This project is a work in progress, culling games from various sources, including several chess training books and personal research. The games are ordered by date (oldest first), not by importance. Be well.
Be safe.
|
|
9 games, 1842-1974 - The Draw as a Tactic-- OTB Examples
|
In many cases for less-experienced players, a draw is a normal outcome of the game and sometimes an accident. In other cases, an experienced player will USE the draw-- it is intentional! For instance, the player who is losing jumps on a draw. A fine player who is winning may blunder into a draw. So, this game collection is to cover those cases and other interesting ones. ChessCoachClark (CCC) originated this game collection in 2024 and he updates it on occasion. This project is a work in progress, culling games from various sources, including several chess training books and personal research. The games are ordered by date (oldest first), not by importance. Be well.
Be safe.
|
|
1 game, 2007
|

